Bunting and bits

September 25th 
Bunting can be used at any time of the year, not just summer!


 My crochet mojo has gone momentarily and the sewing bug has taken over for a while.  This week has seen me burning the midnight oil and making bunting and lots of it.  The British are excellent at putting up bunting for summer parties, just to make us feel jolly, picnics and some even when they are camping.  2012 saw nearly the whole country become bunting mad, especially with those depicting the national flag for the Queen's diamond jubilee and for the summer Olympics in London. A street party, and the British know how to throw those so well, is not a street party without bunting.


However, bunting does not need to come down now that the days are shorter and the temperature is dropping.  True, I have removed the bunting from the garden, but now is time to dress the house a bit and continue that summer feel indoors.

Cutting out all in one go was
the quickest option

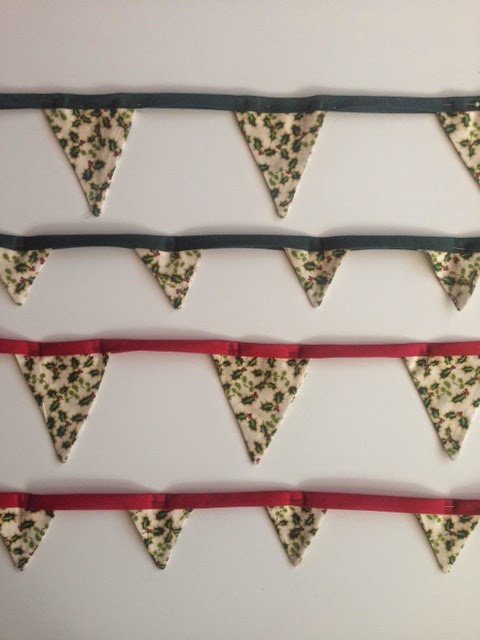
I have made bunting this week for all sorts of occasions, some for a children's bedroom, some for the dining room, short lengths for hanging over the fireplace, I will be careful when I light the fire and some for the kitchen too.  Dare I mention the C word in September?  Look at the last pictures and you will see that I have made several in preparation for the festive season also! 

Bunting is fun to make, but boy is it time consuming.  I found the best thing to do was to cut out all my shapes first, then sew them right sides together, straight away, one after the other.  Then I had a
mammoth turn them all inside out and iron session before I could place them on the tape or bias binding depending on which I was using at the time.  It took a long time, but it was worth it!

I think bunting looks lovely and I may turn my hand to some elegant lacy ones for the dining room, hung up for grown up dinner parties...
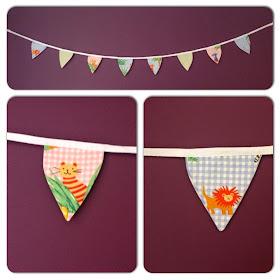


Bunting for a child's room


Bunting does not have to be triangular, play with shapes, it's fun


Bunting and fairy light, a good combination


Miniature bunting on a short length,
perfect for dressing up an internal door...

...or perfect for dressing up a fire place
Funky shaped bunting made from retro men's shirts

 Look away now if it is too early for you to even consider the C word in September... these are all to be finished on the sewing machine, but I am almost there!

A short piece of bunting, ideal for chair, door
or fireplace dressing.  Where else would
you put the bunting?

Changing the colour of the bunting line
but keeping the fabric the same creates
a different look very easily.


Same bunting material, but different sizes
and different colour bunting lines


  What have you been up to this week?

Cushions again?!?

September 19th 

On Tuesday I drove over to my MIL to collect some of my FIL things.  It is always a difficult and raw time after you loose someone and touching their belongings too seems both right and wrong.  Mixed emotions.

On return home, I could not lift some of the items out of the car and so there they stayed until the children came home and helped me, but I did look through one bag on Wednesday morning and my whole day suddenly changed.  That which I had planned flew out of the window and nostalgia took over and the sewing machine had to come out.  What did I find?  My FILs old shirts...  I knew that they were coming into our house, but I did not realise the effect they would have on me.  I had a day full of memories and began to cut up the old shirts and make cushions for the grandchildren out of them.  Something to hold and snuggle, something of their grandfather.


As I was making five cushions out of six shirts I had to be a little creative in how I used the shirts, but think they turned out well.  The two that have received theirs certainly appreciated them and have pride of place on the sofa.  I still have three to finish, the fronts are made, but I am waiting on cushion inners and then I will make the backs up and hope to post them to their new homes next week...

Each letter had a template made up first

Trying to keep the stripes in line!

Good old zig zag on the machine

Attaching the 'J' was the hardest letter of them all

The pink and blue looked particularly good, I thought

The three cushions still to complete


Completed shirt cushion
I used an envelope style pattern, so no zips needed and
incorporated the breast pocket of the shirt too
 on the back side of the cushion


This shirt back was so soft and very tactile


The children loved their new cushions and
snuggled up with them immediately


Even the cat loves the cushions,
 they hold memories for us all
Memories are important and this little thing I did on Wednesday made me look back on happy days but also forward.  Life has to go on...


Hoping you all have a beautiful weekend

Cushions, cushions and more cushions

September 18th 

Putting the drawn pattern behind the
material made it easy to embroider
any shape or pattern
At present my days are filled with crafting and not earning and I love it!  My work load is often quiet at this time of year and I have learnt to embrace it with both arms and make the most of it.  Knowing that this does not tend to last very long, I begin so many new projects and this week seems to be bursting with new things to try and do.  The first of this weeks makes was an embroidery cushion which was quick  (my favourite kind) and very therapeutic.   

How did this project begin?  Well, my son seems to be in a growing spurt and has jumped two year sizes in school shirts, having asked a couple of friends if their sons wanted them and being politely refused, I decided that the charity shops probably would not want them either, so it got me thinking...

...maybe I could use the back of his shirt as a front cover for a cushion...  I set to straight away.

I knew immediately that I wanted to base it on Scandinavian red embroidery work and so began googling various patterns, the Internet is full of free patterns and you could spend forever on there and not actually do anything!  Not one pattern was suitable, but I amalgamated a few and cobbled something that I was happy with. I drew out the design and then placed it behind the cut up shirt which was placed in an embroidery hoop and began to trace the pattern onto the material.  I have one of those disappearing ink pens for fabric which should in theory disappear after some time.  Mine must be old as the ink began to disappear within five minutes, meaning I could only trace a small section of the pattern at a time.  It was a race against the disappearing ink!


Embroidery and traced pattern,
beginning to disappear already

Progress was quick and I was able to sew
and sit with the children whilst they watched some TV

Front and back view

Almost finished, after a second evening

I had intended to back the cushion with a red fabric,
but instead opted for another section of a school shirt!

The cushion was lovely but looked lonely
on my sofa, so I have begun a second


This will be the main section of the second cushion,
 hope to finish it tomorrow...
These cushions would not win any awards, the stitching is uneven and they are not symmetrical, but they have cost me nothing except time as I had in house everything already. 
I think they make better cushions then they did school shirts!

It is almost the weekend,
cannot wait for the family to be together.

Blogging - why do it?

September 13th  


Why do you blog? Why do I blog? Why do we read blogs? What's the point? What's the fascination?  Well I cannot answer all of the above but I can answer from my perspective. I would love to know your views and thoughts too. 

I began blogging ten months ago at the beginning of last December. It happened quite by accident. For some time leading up to the first post I had been comtemplating writing a note book/diary for my children  about all the things we do in our household leading up to Christmas. Tradition is important to me, the old ones we have had for years and embracing new ones too. I love the festive season and the Scandinavian part of me has a field day. I wanted to put this all down for the children for the future. 

It suddenly dawned on me as I was sitting down thinking about this diary log that I was about to begin how much work it was going to be and that it might be easier to type it up rather than hand write it and would be so much easier to add in photographs too using the computer. Slowly slowly the penny began to drop that maybe a blog would be a good idea.  Just for the month of December. Bearing in mind I had not even read a blog before (my husband and children had had one for a while, but that was my only foray into the world of blogging) so I was not really sure what it entailed but it seemed like a good solution to my needs. 

Without really researching or thinking too much about it I set up an account with blogger and I was off.  And boy was it fun, but wow how time consuming, I had no idea. 

The thing with a blog is that not only do you have to have an idea, you need to often research, take photographs, make or do the item you are discussing and make sure you do it stage by stage if you are trying to be informative and THAT takes so much longer than if you were normally doing it. Add to that the steep learning curve of setting everything out on the page, the tears and frustration when the page doesn't look as you wish and the hours trying to sort it out only to find it hasn't worked!!!  December is always a busy month but last December in promising myself to post everyday was almost insane. But do you know what? I loved it and became hooked. 

So my blogging days began out of a desire to show and keep a record for my children but as the month of December passed by and I had fulfilled my wish, I chose to carry on. Why?

For me, the interaction of people commenting and friends talking to me about it, meeting new 'virtual' friends was addictive. I love receiving comments on the blog and welcome lots more. Unfortunately I  seem to have some sort of an issue with several people not being able to comment for one reason or another and that upsets me. Who else whom I have yet to meet has not been able to comment? Consequently I set up a Facebook page called eclectichomelife as well, whereby people can comment without trouble. If you have tried but not succeeded please drop me an email to:  eclectichomeandlife (at) gmail (dot) com. Please note that the email address has the word ' and ' in it also!

So far other than last December when I knew what I was to blog about, each month has been ramblings of the things I make and do. But for the first time I am now beginning to think ahead with the blog and am starting to write a list of items I wish to blog about. I too would like to build on my followers, but how to do that, so I may even dip a few toes into the internet to see how that maybe achieved.  I hope my enthusiasm shines through and my positive outlook on life. This blog has become my friend and my little bit of 'me' time in an ever busy world. I hope you can and want join me on my journey. 

Do you have any blogging tips or advice? Why do you blog? What made you begin? If you do not blog, why do you read them? What do you want from a blog? Any thoughts, comments, advice gratefully received. 


Crocheted fingerless mittens

September 12th 

Hot coffee and crocheted mittens a good combo
Before sitting down to write a blog post I make myself a coffee.  Today was no different, except that I made the coffee a tad strong and therefore needed extra milk.  Not leaving enough space to add the extra milk did however not stop me.  Some uncontrollable urge to fill the cup to the brim until the liquid within produced a perfect, held within the cup, did not flow over, dome shape.  Question was now, how to move said cup without spilling?  I couldn't!  So I lent over and slurped the coffee which of course was still far too hot for me to drink, I do not have an asbestos mouth as some people appear to have and consequently burnt my lip and tongue.  I feel and look a fool, does anyone else have uncontrollable silly urges that you just can't stop even though you know the idea is pants?!  No?!?!?  Just me then.  (At least I still didn't spill any!)

Yesterday I saw a post on one of the Internet crochet sites I belong to of some fabulous fingerless mittens.  I have secretly been harbouring an urge to knit a pair after my daughter received a lovely neon knitted set.  But my knitting skills are not up to much, so I have been thinking perhaps I should start with something more simple.  But salvation came with this pattern in regards to the mittens.  Again using just stash busting yarn, I set to.  The pattern called for chunky yarn, of which I had none, so I doubled up and used two strands.  What do you think?


The pattern is designed by a young Australian called Olivia and her blog is delightful, she has such a fresh and open view of the world.  I am her latest subscriber to her blog.  If you have not found her yet, I urge you to have a peek here

So to make her mittens, a quick photo journal of my creations, but pop over and see her pattern, link below the photographs.


Chain 32 and for the second row single stitch from the second
loop from the hook till the end of the row.

Row three same as row two.  Row four is where the button hole is
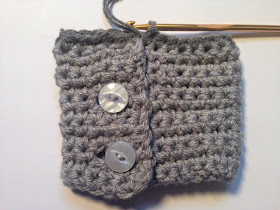
created. With four stitches left at the end of the row, chain two, miss two
stitches and single crochet the last two stitches.  See photo above.

Row five single crochet the whole row, remembering to
crochet into the two chains also.

Row 6 & 7 single crochet each row. 
Row 8, creating a second button hole, repeat row 4.


Row 9,10,11,12, single crochet, fasten off. 
Then make a second wrist cuff.
Sew buttons onto the wrist cuffs.

When ready to create the body of the mitten fold over the wrist and
crochet both layers together.  I overlapped my cuffs with four
stitches.  Continue round the whole cuff with single crochet.

Row 1 of the main body should end up looking
as in the above photograph.
The main body is made up of puff stitches, you need to yarn
over, insert in stitch, yarn over, pull through the stitch only, you should now
have 3 loops on the hook and repeat this again in the same stitch, making
sure you end up with 5 loops on the hook and finally repeat again making
 a total of seven loops on the hook.  then yarn over and pull through ALL
seven stitches.  this is a puff stitch.  there are good you tube tutorials if you need help. 


After each puff stitch, chain two, miss a stitch and then puff
stitch in the next stitch.   Continue all the way round.
 Repeat for row 2 also.  Row 3, I then reduced the number of chains
between each puff stitch to one, Olivia does not do this I her pattern,
 but I felt it made it a more snug fit.

Row 4, continue with puff stitch till the half way mark where you would like your
thumb to be, put it on to check you have the correct location.  After the puff stitch
before you would like your thumb hole, chain four, then double crochet into the
next space and puff stitch in the same space.  This creates the thumb hole.  See above.

Row 5 & 6, puff stitch all the way round with
one chain space between each. 

Row 7 & 8 double crochet around the mitten to finish off.
 Once finished fasten off and weave in all loose threads. 
Repeat for second mitten.

 Yesterday I made all three pairs of mittens, they are fun and quick and really addictive to make.  I shall be making plenty more.  Are you tempted?  Let me know how you get on and thank you Olivia for such a great pattern.


 For Olivia's pattern see here


♥Thank crunchy it is Friday, have a great week end!♥