• Home
  • About
    • Crochet
    • Knitting
    • Baking
    • Christmas posts
    • Sailing & Travel

      Crochet and Cardamom and cinnamon cake

      30th January

      Crochet and tequila, is that a good mix?


      We are now two thirds through the crochet course and the ladies are becoming ever so slightly rowdy.  I cannot fault them in their crochet skills, who would have thought 28 days ago, they would be so productive and proficient.  I am immensely pleased with progress.  There is much laughter and fun to be had around the table with crocheting taking place most of the time, the odd sip of tea or coffee and the occasionally munch on some cake, but tequila!  That was not on the cards...

      This week they learnt a new stitch, the bobble and as often the case some do not like change and are resistant to leave the stitch they are on. But in the end we all seem to get there and be happy in having learnt something new.


      Here are some of the blankets to date,
      two are missing as I was not able to photograph them last night...


      It would appear that crochet is sending us to drink...


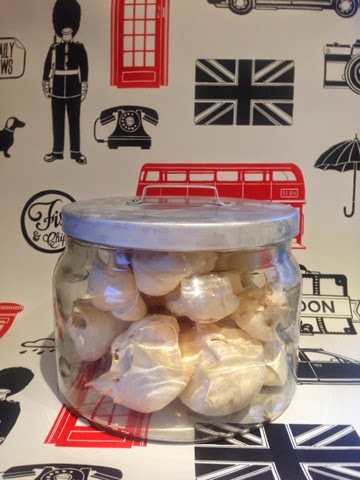
      So what to dish up to these very deserving ladies... I decided to spoil them with meringues and cream this week and some fresh fruit and so made them a few days ahead.  However, I made a fatal error in wanting to photograph them for another post, see HERE  and left them in the family 'help yourself' jar.  I just wasn't thinking, blogging took over and I had such fun.  On coming down to the kitchen yesterday morning I did experience a heart stopping moment when I noticed the number of meringues had reduced from 24 to 3!  Not enough to feed my cake starved Thursday evening ladies...  I had neither the time nor the inclination to pop to any shops whatsoever, so wracked my brain as to what we had in store.  I came up with another family favourite using yeast and knew as the day ahead was busy I needed to get a shift on.  This may have been my second downfall...
       
      Cardamom and cinnamon cake
       
      I made the lovely Cardamom and cinnamon cake as usual and then dashed off to complete various appointments.  It was only when dishing it up to said ladies that I felt it was much heavier than normal and although it looked fantastic, if I do say so myself, on delving in was somewhat dry.  It's a good job we drink copious amounts of tea and coffee.  Please do not let this little tale put you off, I have made this cake numerous times and never before have I had a failure.  It was a freak of nature and all began to go wrong when I could not serve up my meringues.  Give it a try, you will really love the lightness of it with the combined taste of cardamom and cinnamon.
       
       
      Cinnamon and cardamom cake  
       
      You will need:  
       
      For the dough:   
                      
      225ml whole milk
      75g butter
      300g spelt or plain flour
      125g wholemeal spelt or wheat flour
      70g caster sugar
      2 tsp cardamom
      1/2 tsp salt
      10g fast action dried yeast
      1 egg, eaten
       
      For the filling:
      75g butter, softened
      50g caster sugar
      2 tsp cinnamon
      drop of vanilla essence
      For the glazing:
      1 egg, beaten
      sugar to drizzle

      A well greased cake tin (8") with high sides.
       
      1  Scald milk with the butter until melted and hand warm, do not let it boil
      2  Sift all dry ingredients together and add yeast, mix well. 
      3  Make a well in the middle and add the beaten egg and hand warm milk mixture.  Stir together to forma sticky dough.
      4  cover with lightly greased cling film and leave in a warm place to prove for half an hour.
      5  For the filling, cream the butter, sugar and cinnamon.
      6  Roll out dough on lightly floured surface to a rectangle to approximately  35x25 cm
      7  Spread filing over the entire side.
      8  Roll up the dough so it looks like a Swiss roll.
      9  Cut seven slices with one perhaps slightly smaller than the others.
      10  Place smallest slice in the middle of the cake tin and surround it with the remaining six slices.
      11  Allow the dough to prove for another 30 mins in a warm place, covered with Clingfilm
      12  Glaze buns with beaten egg and sprinkle with sugar
      13  Place in a pre heated oven, 180 degrees Celsius and bake on the middle shelf for approximately 20 -25 minutes.
      14  Cool on a wire rack
       
       
      ♥  Happy Friday 

Photographing for blogging

29th January 

Not that I have mentioned this to you wonderful lot but another one of my personal challenges this year is to try and get to grips with this blogging lark a bit better.  There are numerous things I wish to achieve, not least changing the layout and having a cleaner crisper look, sorting out my side labels, taking off the dropping down hearts, I know it annoys some of you and generally having a good old fashioned spring clean.  I am even muting, dare I say it, switching over to the other side, shhhh, WordPress?!?!?  All these things I am sure will be achievable, but I am scared of technology, I do not understand it and I am not convinced it understands me, the mere fact that I even blog, have a fb account and am on IG and now tentatively on Twitter is a crafting miracle I tell you.

But one thing I can try to improve on is my photography and styling skills.  I do not wish to fork out, yet, any money for a course, although there are some seriously tempting courses out there for several pennies worth but instead to start with I will read up as much as I can and practice, practice, practice.  Do you have any tips for me, where I should read, what I should do to improve.  Ideas, advice and help ever so gratefully wanted and received...


I often use wallpaper samples as my back drop for certain types of photographs and have an eclectic why are you not surprised range of wallpaper types.  I thought in my determination to improve and after having had a blogging conversation with the wonderful 'Twisted Yarn' blogger decided to put my money where my mouth was and begin on this journey.


I decided to use the same product to photograph but use different backdrops to see how this can affect the final feel and style to the photograph.  At this point I am not concentrating on the actual photographs skills nor that the lighting is not great, but just wanted to see what different back grounds did...
 
An eclectic mix of wallpaper sample to use as photograph backdrops

I made some meringues ready for the Thursday crochet lessons and decided to photograph these I have since realised not to make things too many days in advance as I now only have three left for tonight as some monkey or monkeys have been nibbling merrily away at them without me realising!?!?!

Cream background with a silver thread,
I used this a lot in photographs over the Christmas period


Mock wood background, this is one of my favourites to use,
although not keen on seeing the lines move from the ground and up to the back

I have not actually used this one before, but can see potential here

Great fun simmer background but far too busy for this type of shot 


Again a fun background, maybe ok for a summer theme? Very busy


Despite being busy, there is something that almost
works here, is it that all the picture are
fairly solid and on a plain background?


Plain does work well, perhaps not the correct colour

I have a tendency to red, it's plain and vibrant,
I quite like this, although have only used it on one or two occasions
I am still in the process of deciding which I like and how to go about this.  I lean on the cleaner, calmer crisp look as in the cream with the silver thread and the wood look one as well as the vibrant red. 

  What do to you think.  Please do share...


Bloggers meet up

28th January  

Crocheted brooches
So blogging... why do it, asked that before...what's the point, yep, answered that too..so what's left?  Ahhh...a meet up in the flesh...

Yesterday I met my second ever, never known to me before the internet and  this blog began blogger.  Having
learnt my lesson last time and invited a fellow blogger to my house for a cuppa and to chat 'blog' and having been severely reprimanded by both a close friend and my daughter, reminding me that I would not allow my children to bring internet 'friends' to the house, thought this time perhaps I better play it a little bit safer and meet in a public place. 

So it came about that Amy from Love Made My Home blog and I met in a gorgeous coffee shop almost equidistant to our humble abodes.  Luckily for us we had been given the heads up to pre book a table for 11.   11 o'clock and you need to book a table, bonkers I thought to myself, but heeded the advice and am I glad I did. The café in question was packed and we would not have managed to acquire a seat otherwise.  Having arrived  few minutes after Amy, I was told she was sitting at the back and as I head turned to look beyond the people standing in front of me the owner of the café said, 'Ahh, of course you won't know who she is, this is a blind date!'  She needn't have feared as Amy and I were all over that dilemma like a rash, we had agreed to crochet our own brooches and either blog about them or email them across before meeting up.  Amy was a tad worried that there may be a crochet brooch convention in town that day, but we were in luck and we appeared to be the only two 'crafty' ones in visible sight.

We spent a great couple of hours chewing the fat, getting to know more about each other and talking blogs.  How do you do this... have you tried that... what do you think about this... There was much laughter and no awkward silences and it would appear that neither of us are mass murderers.   As with meeting up with Phil from the Twisted Yarn, it was fun and refreshing and I did not feel I had to curb my enthusiasm as some else's eyes glazed over as soon as I mentioned the word BLOG.

So what brooch did I wear?  Good question and one I kept asking myself for the last couple of weeks.  I left it as I often do till the eleventh hour and was to be found sitting in our study in the early hours of the morning before our meet up crocheting a brooch, well two actually, as I wanted to give a little gift to Amy...

I found a wonderful brooch made by the equally talented Sarah of Annaboo's house, if you are a crochet fan and have not discovered her yet, scroll down to find the link, it's worth it, I promise you. And so began the Scottie dog brooches...


Scottie dog crocheted body


Adding on the crocheted head to the Scottie dog


Two sides are needed of the Scottie dog body and then
crocheted around to form a 3D shape

By the second brooch, I was tired and
he became a little crochet fudged, but looks fine


Getting ready with my crocheted brooch

To follow the clear and easy instructions to make your own Scottie dog, just follow the link to Annaboo's house:   Scottie dog brooch tutorial

Amy was so sweet and also presented me with a crochet brooch and I am wearing it now as I blog, hence the not so perfect photograph.  To see a great shot of it and to find the tutorial for her lovely brooch follow the link to her blog: Amy's crocheted flower brooch


A few snaps of the quaint village that we met up for lunch....


Quaint UK village


Village hall dating from 1900
 

Alongside the river Thames

Mill house, the water was cascading and defeaning


The only photograph I remembered to take of the café


 ♥  A toast to meeting new people and
facing new challenges throughout the year 

Crochet and chocolate cardamon cake

20th January 

Chocolate cake, easy to make and taasty
Two days before the second crochet course, I was privileged to be invited over to another bloggers house for tea and cake.  The very talented knitter guru, crochet goddess and writer extraordinaire, that is: http://thetwistedyarn.com/  Truly if you have not visited her blog, you are in for a treat.  Her words never fail to make me smile and the creations she produces are wonderful.  I am very pleased to be able to call her my new friend.  Through the internet we became acquainted and messaged each other every once in a while, then more frequently and then suddenly a meet up was suggested.  We try to see each other now,  as often as we can,  busy lives permitting. 


It was at the 'Twisted' house that I was given the most delicious chocolate cake.  I am addicted to chocolate, have been all my life, but am trying very hard over the last 6 months to limit what I eat and I am managing better than I thought I would.  However, I could not resist the cake...  Funnily enough, I bake a fair amount, love chocolate as I've said, but am totally useless at making chocolate cakes.  Twisted promised me this was a fool proof recipe and anyone could make it, yeah, right I thought...  but she's right.  I managed it!  I am totally stoked by this and so giddy with happiness, that I asked her permission to share her cake with my crochet ladies in week 2 and now I share it here with you, Twisted's permission given of course.  Go on over and see how amazing she is...

This chocolate cake rises well
Twisted Chocolate Cake 

You will need:

♥  200g good quality dark chocolate
♥  200g unsalted butter
♥  75ml milk
♥  dash of white wine vinegar or lemon juice
♥  85g plain flour
85g self raising flour
third tsp bicarbonate of soda
30g cocoa powder
200g light muscovado sugar or light soft brown sugar
180g caster sugar
dash of vanilla essence or almond essence
3 eggs, beaten
optional extra:
♥  3 tsp ground cardamom

1  Pre heat oven to 140 for a fan oven, 150 degrees for non fan oven.  
2  In a pan, gently melt the butter and chocolate with 125 ml water.
3  Meanwhile, add the vinegar or lemon juice to the milk and leave for 5 minutes to make butter milk.
4  Mix the flours, bicarbonate of soda, sugars, cocoa powder (ground cardamom, if using) and vanilla or almond essence
5  Add the eggs and butter milk and mix well.
6  Add the molten chocolatley mixture from the saucepan and mix well.
7  Poor into a deep 8 inch tin.
8  Bake in the oven for about 1 hour 15 minutes. do not check it before this, it may even take longer to bake.  Keep checking with a thin skewer, if it comes out clean, the cake is baked.

I added my own Scandinavian twist to this cake, that of adding the ground cardamom, it was not in Twisted's original cake, which I feel was brave of me, but it worked and added a slight warmth to the cake.  This is totally not necessary as the cake itself is fantastic. 

This is not an every day cake as you can see from the ingredients, but oh my, it is so yummy.  Next special occasion or when you want to spoil someone, this is your cake!
 

Chocolate and cardamom cake and crochet


♥  Enjoy this chocolatley cake. 
Have you any chocolate recipes that I can try? 

Sunlit Sunday

25th January

We have a lot to be thankful for living in a First world country.  All my life, maybe because I am born to parents not from this country but who chose to adopt it as their own, I have often wondered but for the grace of god, I could have been born.... somewhere else less fortunate.

I have often quoted this to my children, but never harped on about it.  My eldest now 15 has had an amazing opportunity through school to travel to Kenya and to help in which ever way for the Nasio charity wish to use her services.  To find out more about this small local charity please follow the link   http://www.thenasiotrust.org/

What has impressed me so much about this whole journey is that there was never any guarantee that our daughter would be accepted.  She had to prepare for an interview at short notice, both her father and I were away for the weekend and she stayed with friends.  But she took the initiative and rang a family friend who has often helped out in an orphanage in India to ask advice and searching questions. 

Once accepted onto the programme along with 12 other young adults, with only minimal guidance they have had to raise over £30k in the last year for the charity that looks after orphaned children, many whom have HIV.  This they have done by themselves but gently guided, they have organised music festivals, open mic sessions, cake sales, bake offs, sponsored walks, gala dinners to name but a few.  Along this journey these young adults have grown in independence, gained confidence and have formed already bonding relationships. 

Yesterday they were on a training session where they had to learn basic first aid, become HIV aware and learn some fundamental words in Swahili.  Whilst in Kenya, they have been informed that they are to dig and build a fish stock pond and a one bedroom extension.  They will have a day in the life of a six year old, walk the six miles to school, attend school for the day, walk the six miles back and then go out to fetch the water, another not insignificant walk.  Collect firewood and then help the grandmother cook the evening meal.  All this a six year old does in a day.  You see how lucky are we to be born where we are...

To say that these young adults who will also attend a day in an African hospital, have to teach a lesson in either maths or English, attend Sunday church service and be expected to sing the weekly Swahili song will somehow be affected and changed in some way is perhaps an understatement.  Not one of these 13 children can change the world, but little by little we can all help to change something a small bit. 

I have watched them the past year,  with now only 19 days till they travel to Kenya, with pride, awe and wonderment and ponder how their lives will be changed shortly from a comfortable first world life and be immersed into a third world country, albeit for a relatively short period.  The future is in this next generation  and despite all the bad and sad depressing news around the world, we have good human beings too, who will overcome the bad one day...

My Sunlit Sunday, is all about hope.  Hope for the future and hope for us all in helping in whatever small way we can, be it the neighbour next door who sits alone or to something else, we must not give up on hope...


I am joining in with Karen and her Sunlit Sunday

 
All thirteen young adults raising money and bonding together
 

♥  Hope your Sunday is full of sun and hope  ♥

Crochet and fruit tarts

24th January

Puffy spike stitch easily mastered and the blanket is growing

We are now half way through our crochet course and I continue to be the proud mother hen of all the ladies.  I am alone most evenings once the children have gone to bed (increasingly later as they work their way through teenage years) and so I sit and crochet or craft or occasionally read, less so these days as crocheting seems to have taken over, but that needs to be addressed I think.  Happily for me the last two weeks I have been joined for an extra evening of crochet company and I cannot tell you how much I enjoy that.

Here you can see the progress that the crochet ladies have been making, remember half of them had never held a crochet hook 14 days ago...


This rainbow blanket is being made ready for university life

 
Having missed lesson 2, this lady had only been
crocheting for 8 days, she had never held a crochet hook before


Progressing onto the granny stripe


Cosy stripe, puffy spike stitch
and granny stripe, all mastered


What is crochet without cake?


These 3 blankets all crocheted by
the same lady are progressing well


This is how you will find me most week day nights...

I unexpectedly had company one night this week.  Having been taught by my Scandinavian mother that you should always offer guests something to eat, I raided my stores to see what I could rustle up with short notice and not wanting to go out and buy something.  I had some blueberries in the freezer, lemons in the fruit bowl and a pre rolled pastry pack in the fridge that actually needed using up... my mind began to whirl and decided on tarts.


Awaiting my unexpected crochet company


Made these lemon and blueberry tarts in a flash for my crochet company

The tarts were in fact so easy to make, tasty to eat, that I made more for this weeks crochet class, this time using the frozen raspberries I had from the garden.


Crochet and fruit tarts, a good combo

Fruit tarts   

You will need

shortcrust pastry either made or bought
tub of soft cream cheese
lemon zest and juice - only for the blueberry tarts
vanilla essence - only for the raspberry tarts
3 eggs
1 tbsp. sugar
handful of berries, I used blueberries and raspberries
12 hole bun tin

1  Cream together the cheese, eggs, sugar and lemon zest and juice or vanilla essence. 
2  Add sugar only for the blueberry tarts.
3  Grease the bun tin.
4  Roll out pastry to about 5 mm height and use round pastry cutter.  Place pastry discs into the bun tin.
5  Add in fruit of choice, for the raspberry tarts, I needed only 3 raspberries per tart and for the blueberries I only needed 5 or 6.
6  Pour in the egg mixture, being careful to not over fill.
7  Place in preheated oven of 180 degrees Celsius for about 12-15 minutes until the filling is set and the pastry is golden in colour.

These are delicious hot and quick to warm through at a later date but are equally as tasty eaten cold.  They can also be frozen for up to 4 weeks.

They really are quick to make, especially if you use bought pastry, not that I do that often?!?!?
 
♥  Hope you are having a grand week end  
 

Five on Friday

23rd January  ♥

Thank goodness for Amy at Love made my home, not only for setting up this group Five on Friday, this is my second round within the group, previous Five on Friday can be found  HERE , but without her gentle reminder at the beginning of the week, I would have forgotten it was my group's turn today.  That could have been embarrassing.

What to post is always a bloggers dilemma and none more so when involved in a group posting and being linked to others.  Hopefully readers may discover new blogs and be so enamoured that they come back as regular visitors.  This is always a hope...

Today I turn my attention to HEARTS ♥  I love them and always have.  In actual fact I have had several heart postings over the 12 months of this blog and here I bring you new and old hearts, of course FIVE in total.  Come along for the ride and join me in crafting with hearts.

Quick planning for Five on Friday after Amy's reminder


Adding a touch of colour and love to my home
 Heart twig centre piece


You will need:

a heart template, I used a cookie cutter to draw round
thin yarn
medium thickness card
large eye needle
twigs vase


Draw round the heart template, remember to cut out an even number.

Place one heart on top of the other and with running stich sew along the middle, (see fig 1)  Keep the tail end long as you will bring this up to the top for using as a tie.


Fig 1:  Running stich along the middle of the heart
and then tie ends together as close to the card
as you can.  Can you see how to fold the heart
 from this photograph to create the 3D effect.


Tie a knot at the top of the heart, with the tail end and the end with the needle,  as close to the card as you can.  I made a double knot.  Again tie another knot further up to make a loop for hanging.  Photos should help, if I am not clear!

Fold each side of the heart over so that it creates a 3D heart effect. 

Make as many as you need  and hang on some twigs/branches that you have placed in a vase.


3D paper hearts


Adding colour in Winter
to the home after Christmas


I may keep this up on the mantle
piece for some time to come...
2   Crocheted heart bunting 

This is possibly my favourite heart posting on this blog and it is actually what started me being quite literally 'hooked' on crochet.  This is not a quick make if you make the bunting, but it is a great pick up and put down craft.  Alternatively you can just make one or two hearts as coasters, the ideas and uses are limitless, pop over and see...  Crocheted bunting post


3   Quick Valentine heart cards 

I love Valentines day but not the commercialism of it, we always make our cards and have a good dinner in the evening.  This year we will be with a whole gaggle of family and so we will spread the love... I have made three cards this year...

With a craft knife and some paper it is relatively quick to whip up a card for any occasion.  This was the most time consuming of the three cards, but made in less than half an hour.   Remember if making a card, to draw and cut on the back side, to leave the front crisp and clean looking.


Paper cutting is addictive:  Valentine card


I always have to get yarn in where I can and last year I crocheted hearts and glued them onto card for Valentines Day.  This year the idea is even quicker.  On the wrong side of the card I drew a quick heart out line and then within it drew the squiggle that you see.  At each end that touched the outside heart shape I pin pricked a small hole and this guided me whilst sewing backwards and forwards to create the card you see below.  Very quick, very easy and I believe very effective.


A hand sewn Valentine card, based on a heart squiggle

Not a lover of craft knives or of yarn?   There is still a simple and quick solution to creating your own card.  As with the yarn card, just draw a squiggle heart and job done!


Quickest card ever, same as the sewn card but just drawn!

4   Felt garland 

Last year for Valentines day I shared a quick tutorial on how to make a garland out of felt with no sewing apart form threading.  It was a quick make, my favourite sort, and in actual fact we kept it up in our porch for most of the year.  It was an lovely colourful addition to our house.  So easy, simple and effective... Felt garland post

The beginnings of a very simple felt garland

5   Crocheted heart pillows

Perfect for this time of year as a love token to a friend, a family member or be kind to yourself.  We have three of these in our house now, but looking back at this post, I think I am itching to make more.  These crochet up very fast and cause a giggle whilst crocheting, pop over to see what I mean... Crocheted heart pillows

These heart pillows can be made in a variety of sizes

So Five on Friday all about my passion for hearts, hoping you found something to start your creative juices flowing or failing that, have enjoyed my passion of hearts.  Thank you for popping over, that is what blogging is all about, sharing, communicating, inspiring and being inspired. 

I am joining in Five on Friday, taking five minutes from our day to enjoy five things.  Please go and visit the other people who are also blogging about Five on Friday this week.


Kirstie from http://journeynorthof49.blogspot.co.uk/

Patricia from http://aplacefor-everything.blogspot.co.uk/

Katharine from http://artefactsobjects.blogspot.co.uk/

Selma from  http://eclectichomelife.blogspot.co.uk/

Marion from http://my-two-girls.blogspot.co.uk/

and of course...

Amy from http://lovemademyhome.blogspot.co.uk/

 
♥  Have a wonderful Friday 
Do let me know what you think...