 |
| First attempt at a kanzashi flower |
It's been a tough year on so many levels this year, am I right? From little almost insignificant things to life-changing, life-altering happenings. When you talk to people almost everyone has a story to tell. And then there are some people who you watch and think wow, you really are one of the stars in this world and you do not realise it.
 |
| Old cotton trousers transformed into a kanzashi flower |
 |
| The tartan kanzashi brooch gifted to my friend |
 |
| These kanzashi brooches were made in June |
 |
| Equipment needed for Kanzashi flower making |
Kanzashi flower
You will need:
cotton fabric measuring 21 square inch
fabric scissors or wheel cutter
tape measure
pins
sewing machine
iron
needle and thread
fabric stiffener ~ optional but recommended
Cut out seven squares of fabric with 9cm sides. Iron each one.
 |
| Fold the squares diagonally, keeping the fabric design showing on the outside. Iron to create a crisp fold. |
 |
| Fold the right-hand corner towards the top corner |
 |
| Repeat with the left side. |
 |
| Iron to create sharp folds. |
 |
| Turn the square over and fold back each side so they meet but do not overlap |
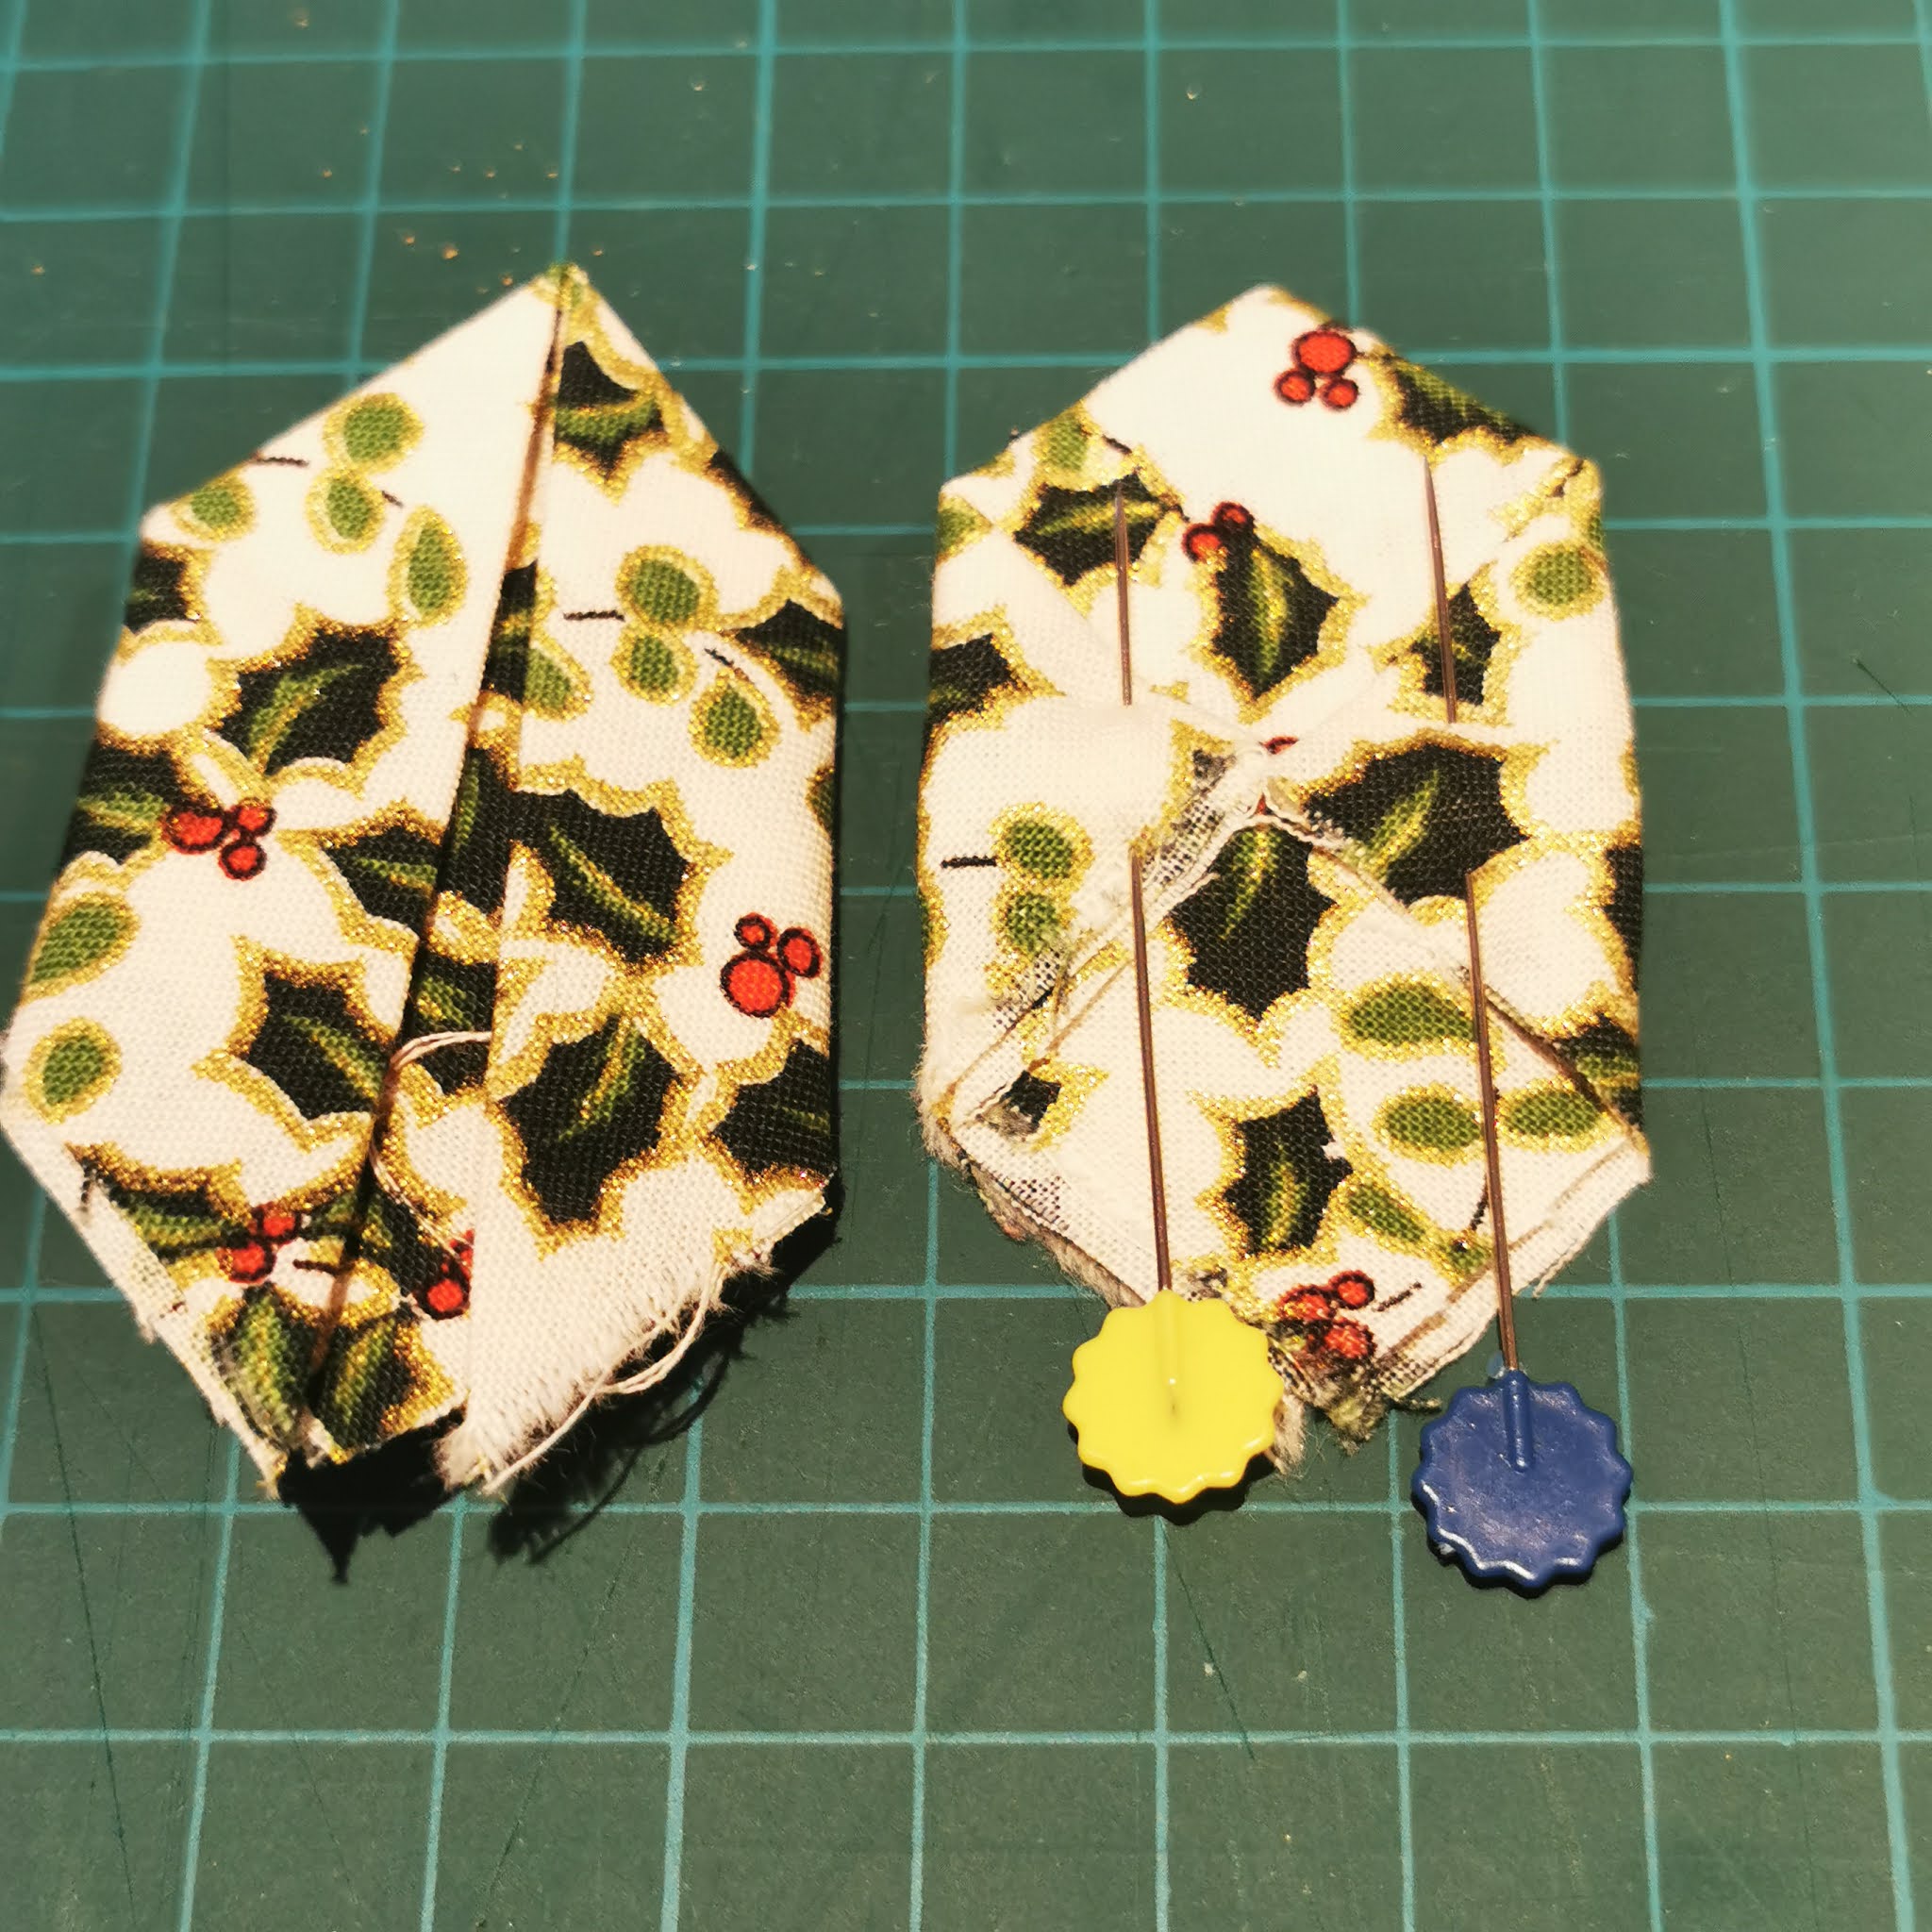 |
| Here you see the front on the left of the photo and the back on the right of the photo. Hold with pins and iron. |
 |
| All folded and ironed, pins removed. |
 |
| Pick up the folded square and fold in half vertically as shown in the above photograph. This shows how the front looks. Remember to do this for all seven. |
 |
| This shows the back at this stage. |
 |
| Hold each in place with a pin. |
 |
| Snip off the end of each petal as shown above, just taking off the slanted section. |
 |
| All petals sniped. |
 |
| To join the petals together take a needle and thread and just a few millimetres up from the bottom sew through all the layers of the petal and repeat for each one. Be careful DO NOT TO PULL TIGHT at this stage. |
 |
| Ensure from one white cross to the next that you go through all the layers of fabric. This is the front of the brooch. |
 |
| This is the back of the flower brooch. |
 |
| To sew the actual petals together which binds the whole thing, sew each edge from one petal to the neighbour petal together, see next photograph for further clarification. |
 |
| Sew from one red arrow across to the next petal |
 |
| Once each petal is sewn with the next, gently pull the threads together to form a tighter flower. Be gentle or the thread will snap. This is the front of the flower. |
 |
| This is the back of the flower. |
 |
| Here you can clearly see how the flower has been stitched together. |
 |
| Once the flower petals have been pulled tight together and you have fastened off your thread, it is time to open out the petals. Here you see one petal opened. It is a question of just putting your thumbs into the petal and pushing away the edges of the fabric to open up. Depending on the type of material you use will depend on how well it will hold it's shape on its own. It may be you need to either spray or glue on some fabric stiffener. |
 |
| A Christmas Kanzashi Flower Brooch. You need to sew on a brooch fastener to the back and you are all done. |
 |
| Kanszashi flower. I left the Christmas Kanzashi brooch like this, but if you look at the summer Kanzashi flowers I made, I also covered a button in the same material and added it to the centre of the flower. Both versions work just as well. |
 |
| On this thin cotton fabric, I brushed on fabric stiffener after I had assembled the flower. |
I have realised that I cannot show you the brooch being worn as both that I made for Christmas have been wrapped and gifted! But they obviously look like the summer ones above but in the holly fabric!
♥ Do you wear Christmas embellishments? ♥


