Showing posts with label Scandinavian. Show all posts

A Scandinavian Carnival

Fastelaven ~ A Scandinavian Carnival

A bit late to the party but I finally made my fastelavaen ris. What is THAT?  I hear you ask, well let
Fastelaven ris
me explain.

All across the world in many different countries, one comes across carnival and all its frivolity and jolliness, I have encountered such wonderful parades across the world through our sailing adventures, some quite scary in feel and others just full of joy.  In Scandinavia, in northern Europe, there is much more restraint, although it was not always such.

Rumour has it that in days gone by in Denmark that a black cat was placed in a barrel and then the barrel was flogged by fastelaven ris until it broke and the poor black cat scarpered away.  Thus it felt taking any bad luck away from the village or town.  Luckily, that tradition is long gone, if ever it really existed and was to be replaced by children waking their parents up early morning on the Sunday before Shrove Tuesday with their homemade fastelaven ris.  This too is now a tradition that most cannot remember happening to be replaced by my mother's generation buying and putting fastelaven ris in a vase on their dining room table.

I recall growing up not really understanding the tradition behind having fastenlaven ris on our table but loving it nonetheless.  Mamma bringing in twigs and branches from outside and then fastening colourful feathers on the bare branches filled me with happiness at the joy of the colour in this otherwise colourless time of year.  Gradually over the coming days and weeks, the twigs themselves came to life with their own buds forming and leaves emerging, a sure sign that outside spring would be following soon behind and we return to a season full of hope.

Lent may have already begun but it is not too late to go outside grab yourselves some twigs and branches and place them in a vase of water and watch as the leaves begin to emerge, I love doing this and have done every year I've had my own home.  Some years, as this year, I have needed more colour in my life and have added the colourful feathers and have true fastelaven ris in my home too.

Easy to make, grab yourself some colourful feathers from your local hobby store, use some thin wire and fasten them to your twigs.  Fun for both adults and children alike and adds just that bit of quirky colourful fun, now to watch the leaves grow...


Twigs and branches from the garden and
store-bought coloured feathers and thin wire is all you need


Attach the feather anywhere on the branch,
can be near the end of even in the middle

Feather added ion the middle section of the twig

Fastelaven ris adds an extra splash of colour at this time of year onto the home

Fastelaven ris


Christmas birds

December 21st

Scrap yarn bird
As a child, we had a few homemade decorations on the Christmas tree, one being a bird made out of
yarn, that mamma had made when she was a child.  She said they had several on their tree and it, along with an angel she made as a little girl, were precious decorations.  Over the years, the bird has disappeared and I was only reminded of it this year when an online tutorial was brought to my attention.  Link to it is at the bottom of this post.  I knew having seen the tutorial that I needed to make a Christmas robin and bring back some of my childhood memories.

These are great quick projects to make in company with adults or children and if I had more time, I know I would have made lots for the tree this year. Got a spare half an hour, then you too could make one of these...

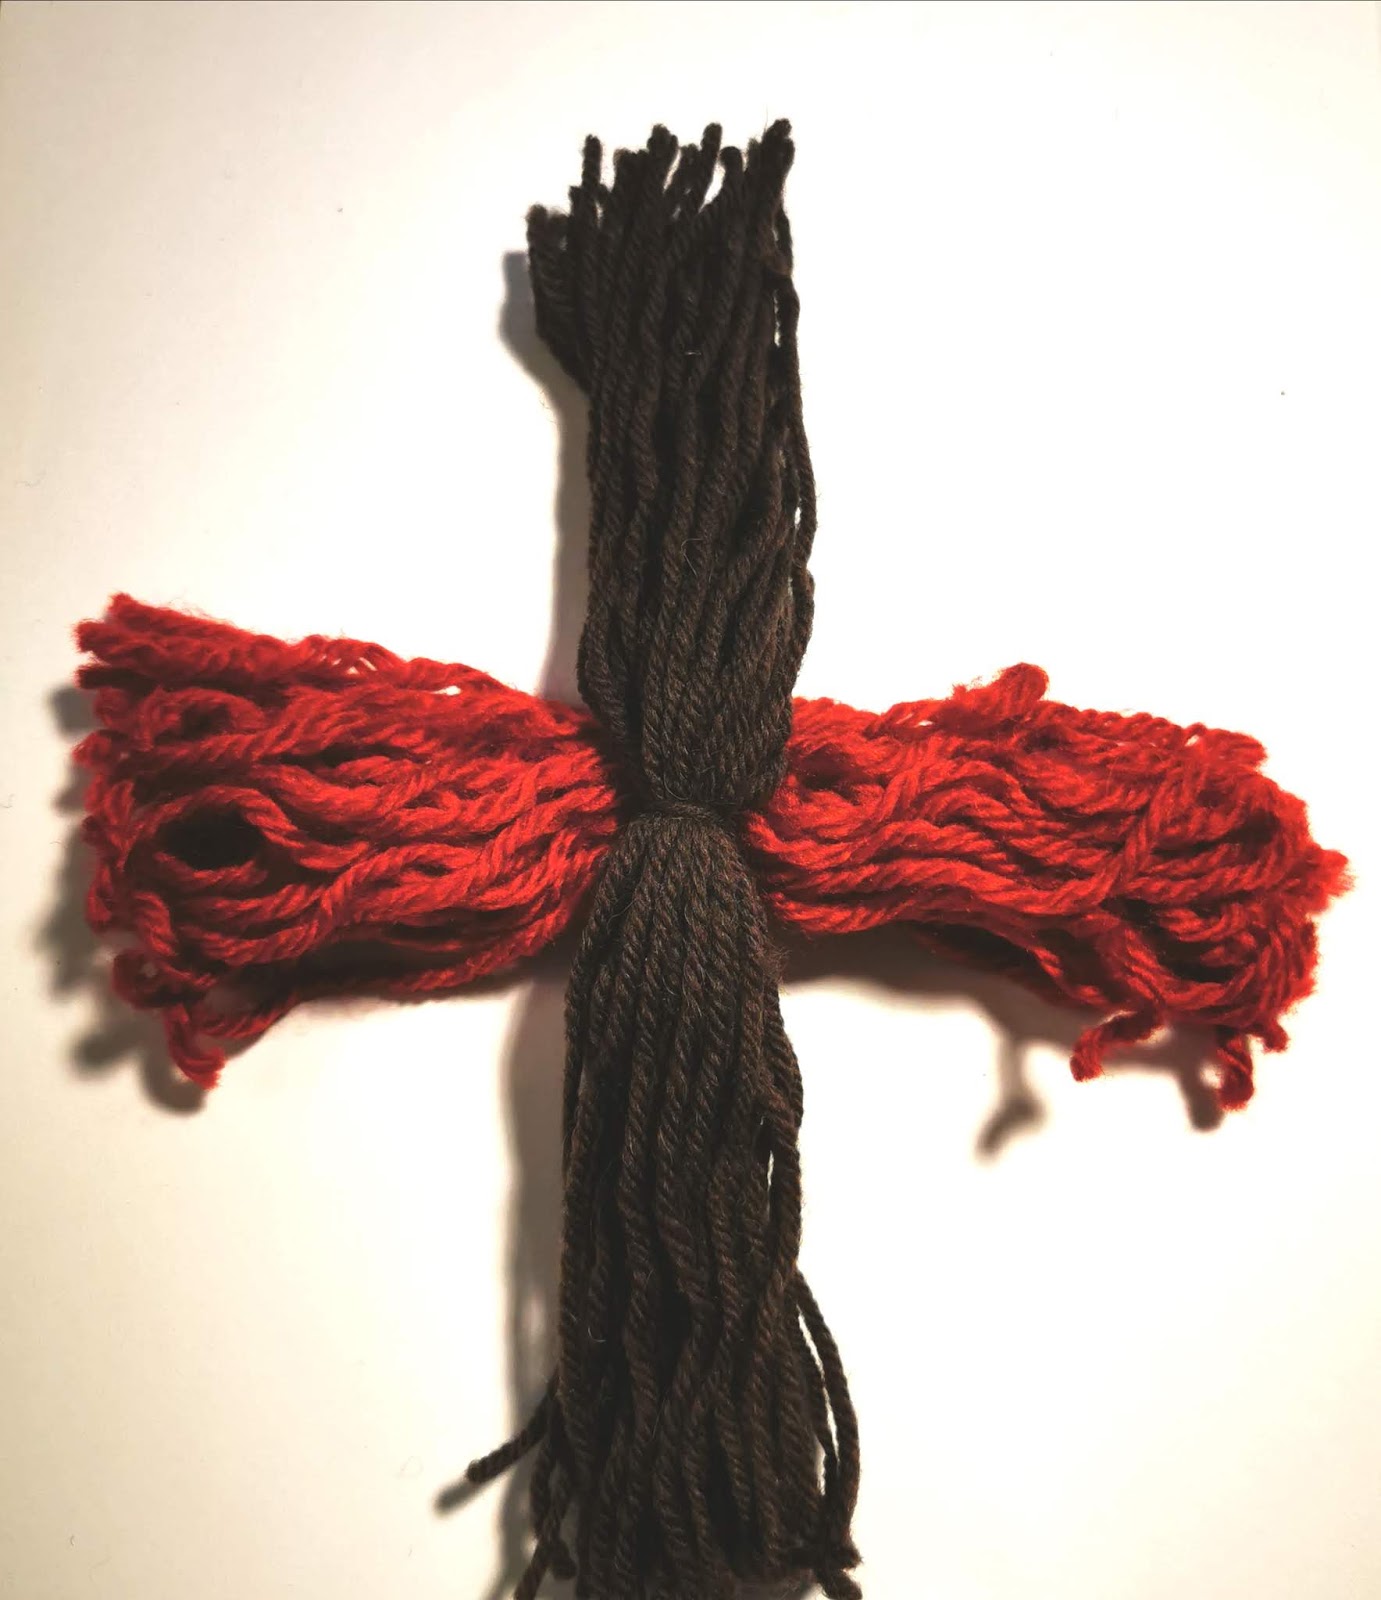
Full tutorial on the link at the end, here are just my photos to give you an idea how to make a scrap yarn bird.


Cut out two pieces of card

Wrap yarn around until you have at least 1cm width of yarn in each colour

Cut just one end, hold tight, so the yarn
does not fall all over the place


Tie each one in the centre

Place the 12cm yarn on top of the 10cm breast coloured yarn

Fold each on half

Take a small new piece of matching yarn for each colour

Tie each as close to the centre as possible

Lay the final colour on top


Scrunch up half an A4 sheet,
his will be the bulk of the bird's body.

Bring together all the loose ends of each
colour section to cover the scrunched paper

Tie tightly  and trim the ends neatly

Make a beak out card

Add some black beads for eyes

Enjoy your bird

As our tree is not yet up, I have added
the robin to the centre of the door wreath

Lovely homemade addition to the wreath

I am sure if we were to make lots of these each one would look different and have their own characters.  Maybe I may suggest to the troops over Christmas that we each make one to put on the tree and give them their own names too!


 For the full tutorial:  Birds


  Hope you have a productive weekend 


Scandinavian Paper Craft

December 12th

Papercraft Scandinavian style Origami stars
Some of my earliest Christmas memories are those sitting with my mother and mormor (grandmother) making paper heart bags for the Christmas tree.  I have written several posts on them where you can learn about the tradition and how to make your own. Norwegian Christmas hearts

A huge part of Christmas to me is taking time out of our busy lives, slowing down and making family time or now as the birds have flown the nest creating some 'me' time and pottering away an hour or two each week to fill me with joy of the season and forget about the wows of our world and the commercialism that Christmas is trying to become.

This year I decided to recreate some of the stars mor (as a family, we shorted the Norwegian word for grandmother from mormor to mor which means 'mother') had on her tree.  They were made from shaved wooden strips and had such a natural feel to them.  Mor's tree was full of these stars, real candles and a garland string of the Norwegian flag, all topped with a straw angle with foil wings.

In searching how to make these stars I began on Norwegian websites but the web is full of how to make them in every language you could think of.  They start fiddly as most things in life do, with a couple of mutterings under my breath as I ripped yet another strip of paper but I persevered and am so pleased that I did.  Sure enough, after an hour of frustration, I began to be able to make the stars in ten minutes flat.


You can use wrapping paper,
wallpaper or specailist origami paper


It is important to LOCK in the paper so it holds it shape


This stage begins to get exciting


Stars growing like rabbits, be warned it's addicitve


A festive subtle addition to the French doors

A few second clip to show how the stars just gently move...


A close up of the papercraft stars origami style


STAR MEASUREMENTS FOR THE STRIPS:  
For large stars, dimensions are 80cm x 2.5cm
For small stars, the dimensions are 44 x 1.5cm


A few links to various star tutorials:  

Norwegian, but slow enough to get the gist...

Star video tutorial

Danish but with no volume, a clear exapmle, but you will need to keep stopping it as it is not real time.

Quick tutorial for stars


Here are links to previous posts on paper crafts and how I 'dress' the French windows every Christmas:

Paper baubles

I have also found on amazon yiu can order ready cut strips the ideal length for these stars too. If you Google Danish paper weaving strips you should find it.


  Have you made any paper decorations, 
do tell... 

Vanilla Fingers

December 3rd
Christmas cookies but maybe too good
to save just for Christmas?


Today is my little sister's birthday and in our household, although Advent has begun, we have lit the first candle, the star is in the window to welcome passersby and the kitchen is full of Christmas cheer, from tonight onwards we can begin to buy and wrap presents.  It has always been an unspoken rule that we wait for Nina to have her birthday celebrations and then can begin Christmas in earnest.  Do you have any December birthdays in your household, if so what do you do to ensure the day is separated to the run-up to Christmas?

SECOND COOKIE BAKE OF THE SEASON
The below cookies are vanilla flavoured and not the typical spiced type that we come to expect of Norwegian Christmas baking, although vanilla does feature heavily in the Scandinavian kitchen.   These are my husbands favourite, he says they have a gentle crunch and then they melt in the mouth.  Give then a try and tell me what you think.  Love to hear from you.


Roll out cookie dough into sausages

Vaniljestenger

  250g softened butter
♥  180g sugar
♥  1 large egg
♥  2 tablespoon of vanilla sugar or 2 drops of vanilla essence
♥  350g plain flour


Decoration
  1 egg white
♥  50g chopped almonds
  7 tablespoons of bakers sugar or the largest grains of sugar you can find

Method
  Whisk the butter and sugar together until a smooth consistency.

  Add egg and continue to whisk.

  Sift the flour and vanilla sugar into the mixture and then knead to a soft dough.
Cut each cookie sausage on the diagonal

  Divide the mixture into eight equal parts.  Roll each one onto a sausage shape to fit across a baking sheet covered with greaseproof paper.  You should be able to fix 4 on each of the two baking sheets.

  Gently press your finger along each dough of sausage to flatten the top.

  Brush each sausage with egg white and drizzle on the baker's sugar and the chopped almonds.


  Bake in a preheated oven of 180 degrees Celcius for 10-12 minutes or until golden brown.

  Cool for a few minutes on a wire rack and then cut each sausage into cookie size cutting on the
diagonal, see photo for clarification.

Place in an airtight jar.  They will last for up to 10-12 days if you can resist not eating them all before!


Vanilla cookies have a gentle crunch and then melt in the mouth


 ♥  Do you have a family favourite cookie recipe you care to share?  ♥

Delfia Cake

December 20th 2018
Norwegian coconut butter


Since I have been married most years my Norwegian aunt made me a fridge cake for Christmas, known in Norway as Delfia kake. It is made from coconut butter, which was unavailable in the majority of supermarkets in the UK twenty-five years ago, now, of course, you can find it almost everywhere.  Tante Berit, my mother's only sibling died last year and left a big hole in our small family.  This year, with mamma here, we made Delfia kake and even though we did not speak of her, my aunt was not far from either of our thoughts.  I think I am going to rename this cake in our house Tante Berit's Cake.

Line a loaf tin with foil

This is a fabulously easy cake to make with children and needs no baking.  It is terribly sweet, so a little goes a very long way.


Tante Berit's Cake


You will need:  


250g dark chocolate
4 tablespoons strong coffee
250g coconut butter
2 eggs
Coconut butter
3 tablespoons sugar
Approximately half a pack of Rich Tea biscuits
100g marzipan
1 bag of sugar jelly sweets, the soft variety, Haribo or equivalent


♥  Line a loaf tin with foil.
♥  Melt the chocolate over low heat, adding the coffee.
♥  In a separate pan melt the coconut butter and then remove from the heat and COOL.  Do not omit to cool, this is very important.
♥  Whisk the eggs and sugar until they form a thick mixture, this will take several minutes.
♥  Add the chocolate to the thicken egg mixture and continue to whisk well.
  Add the coconut butter a little at a time, continually whisking.  Continue to whisk until the mixture has an even look to it.
  Layer the chocolate mixture alternately with biscuits, sliced marzipan and the jelly sweets, finishing with the chocolate. 
  Decorate the top with some jelly sweets.
  Place in the fridge to stiffen up and take out and slice thinly and have with a cup of tea or coffee.    Remember it is sweet!

Melt the chocolate and butter in separate pans

Whisk the eggs and sugar...

Until thick and creamy looking.

Add the melted chocolate,
I had let mine cool a bit too much!

Mix well

Adding the coconut butter gave
it an extra sheen of gloss

Norwegian jelly sweets
literally translate to 'sticky men' !!!

Layer the cake with the chocolate mixture and marzipan, biscuits and sweets.


Layering

Even more layering


Finally, decorate the top layer with jelly sweets


The finished cake after refrigerating

Slice thinly and not as thick
as the picture in this slice!

Perhaps a word of warning, however, if you are going to let the children eat this, I suggest a good run around outside after to burn off the sugar intake and avoid any of those sugar highs!  Enjoy x


An attractive looking cake
that goes down well with children.


  Are you ready for Christmas yet?