Showing posts with label stranded knitting. Show all posts

Christmas basket

Christmas crafting begins in the summer for me when 
I visit mamma in Norway and this year despite
the coronavirus I managed to squeeze in a quick flying 
visit to see her and of course some knitting...  
I love felting, all types but there is something quite unknown about knitting/felting as to what size your eventual items will be.  Wondering whether the width will marry up correctly to the height.  Mamma always says it depends too on your washing machine, a bit like knowing your own oven, does your oven cook a little quicker or slower than recipes say and so it is with washing machines ... it all adds to the spice I say.

Don't you just love how increases look on dpn


It's so exciting when the pattern begins to emerge


The basket begins to emerge


The stitch definition will be lost when felted


Basket before felting


Dpn decreases for the base of the basket


Could this be a hat? 


Photo to show the size of the basket before felting


Place the knitted basket in the washing machine with a couple of 
towels to aid the friction and rubbing whilst being washed


Once the basket comes out of the washing machine it is imperative to mould it onto something to get the correct shape.  Sometimes it takes a few goes to find the correct mould... 


I definitely was not the correct size or shape for the drying process so I resorted to using a bucket.  Unfortunately, the photos I took have mysteriously disappeared and as I do not own a round bucket and now with lockdown restrictions in place I can not just 'pop' back over to mamma's to take another photo with her bucket, you will have to imagine the next photo...


Imagine a photo here of an upturned purple bucket,  
with the felted basket, wet and dripping with water, tied around and around  
tightly to the bucket to hold the walls as close as possible to the sides of the bucket.

Here is a mock-up of what the
the imagined photo could look like... ;)


A Christmas Felted basket, ready to use

The basket is large, it has a diameter of 25cm and a height of 16cm and is proving perfect for Christmas satsumas and clementines...

Knitted felt basket full of Christmas satsumas,
what could be more appealing?


If you are interested in making this, the pattern is from Garn Studio and can be found here: Felt basket they also have patterns for Spring baskets too.


  How are your Christmas preparations coming along? 

Christmas Pot holders

Christmas potholders, Norwegian style
I tend to think about my Christmas makes towards the end of the summer and usually when I am home visiting mamma in Norway.  This year was no exception.  I returned to one of my favourite sources of inspiration the Norwegian website, GarnStudio and as usual, was not let down.  I fell instantly in love with the below pot holders and once I had made one, just had to make a second.  If you are a knitter, these are a breeze and will take you no time at all.  If you are new to knitting these are not complicated and Garn Studio has several accompanying videos, with no sound, so suitable for all languages; you just may have to stop and pause the video a couple of times to rewatch a small section, they are clear and have helped me on the odd occasion.  I find the Garn Studio patterns easy to follow and often if you have a query on a pattern they do respond fairly quickly.  

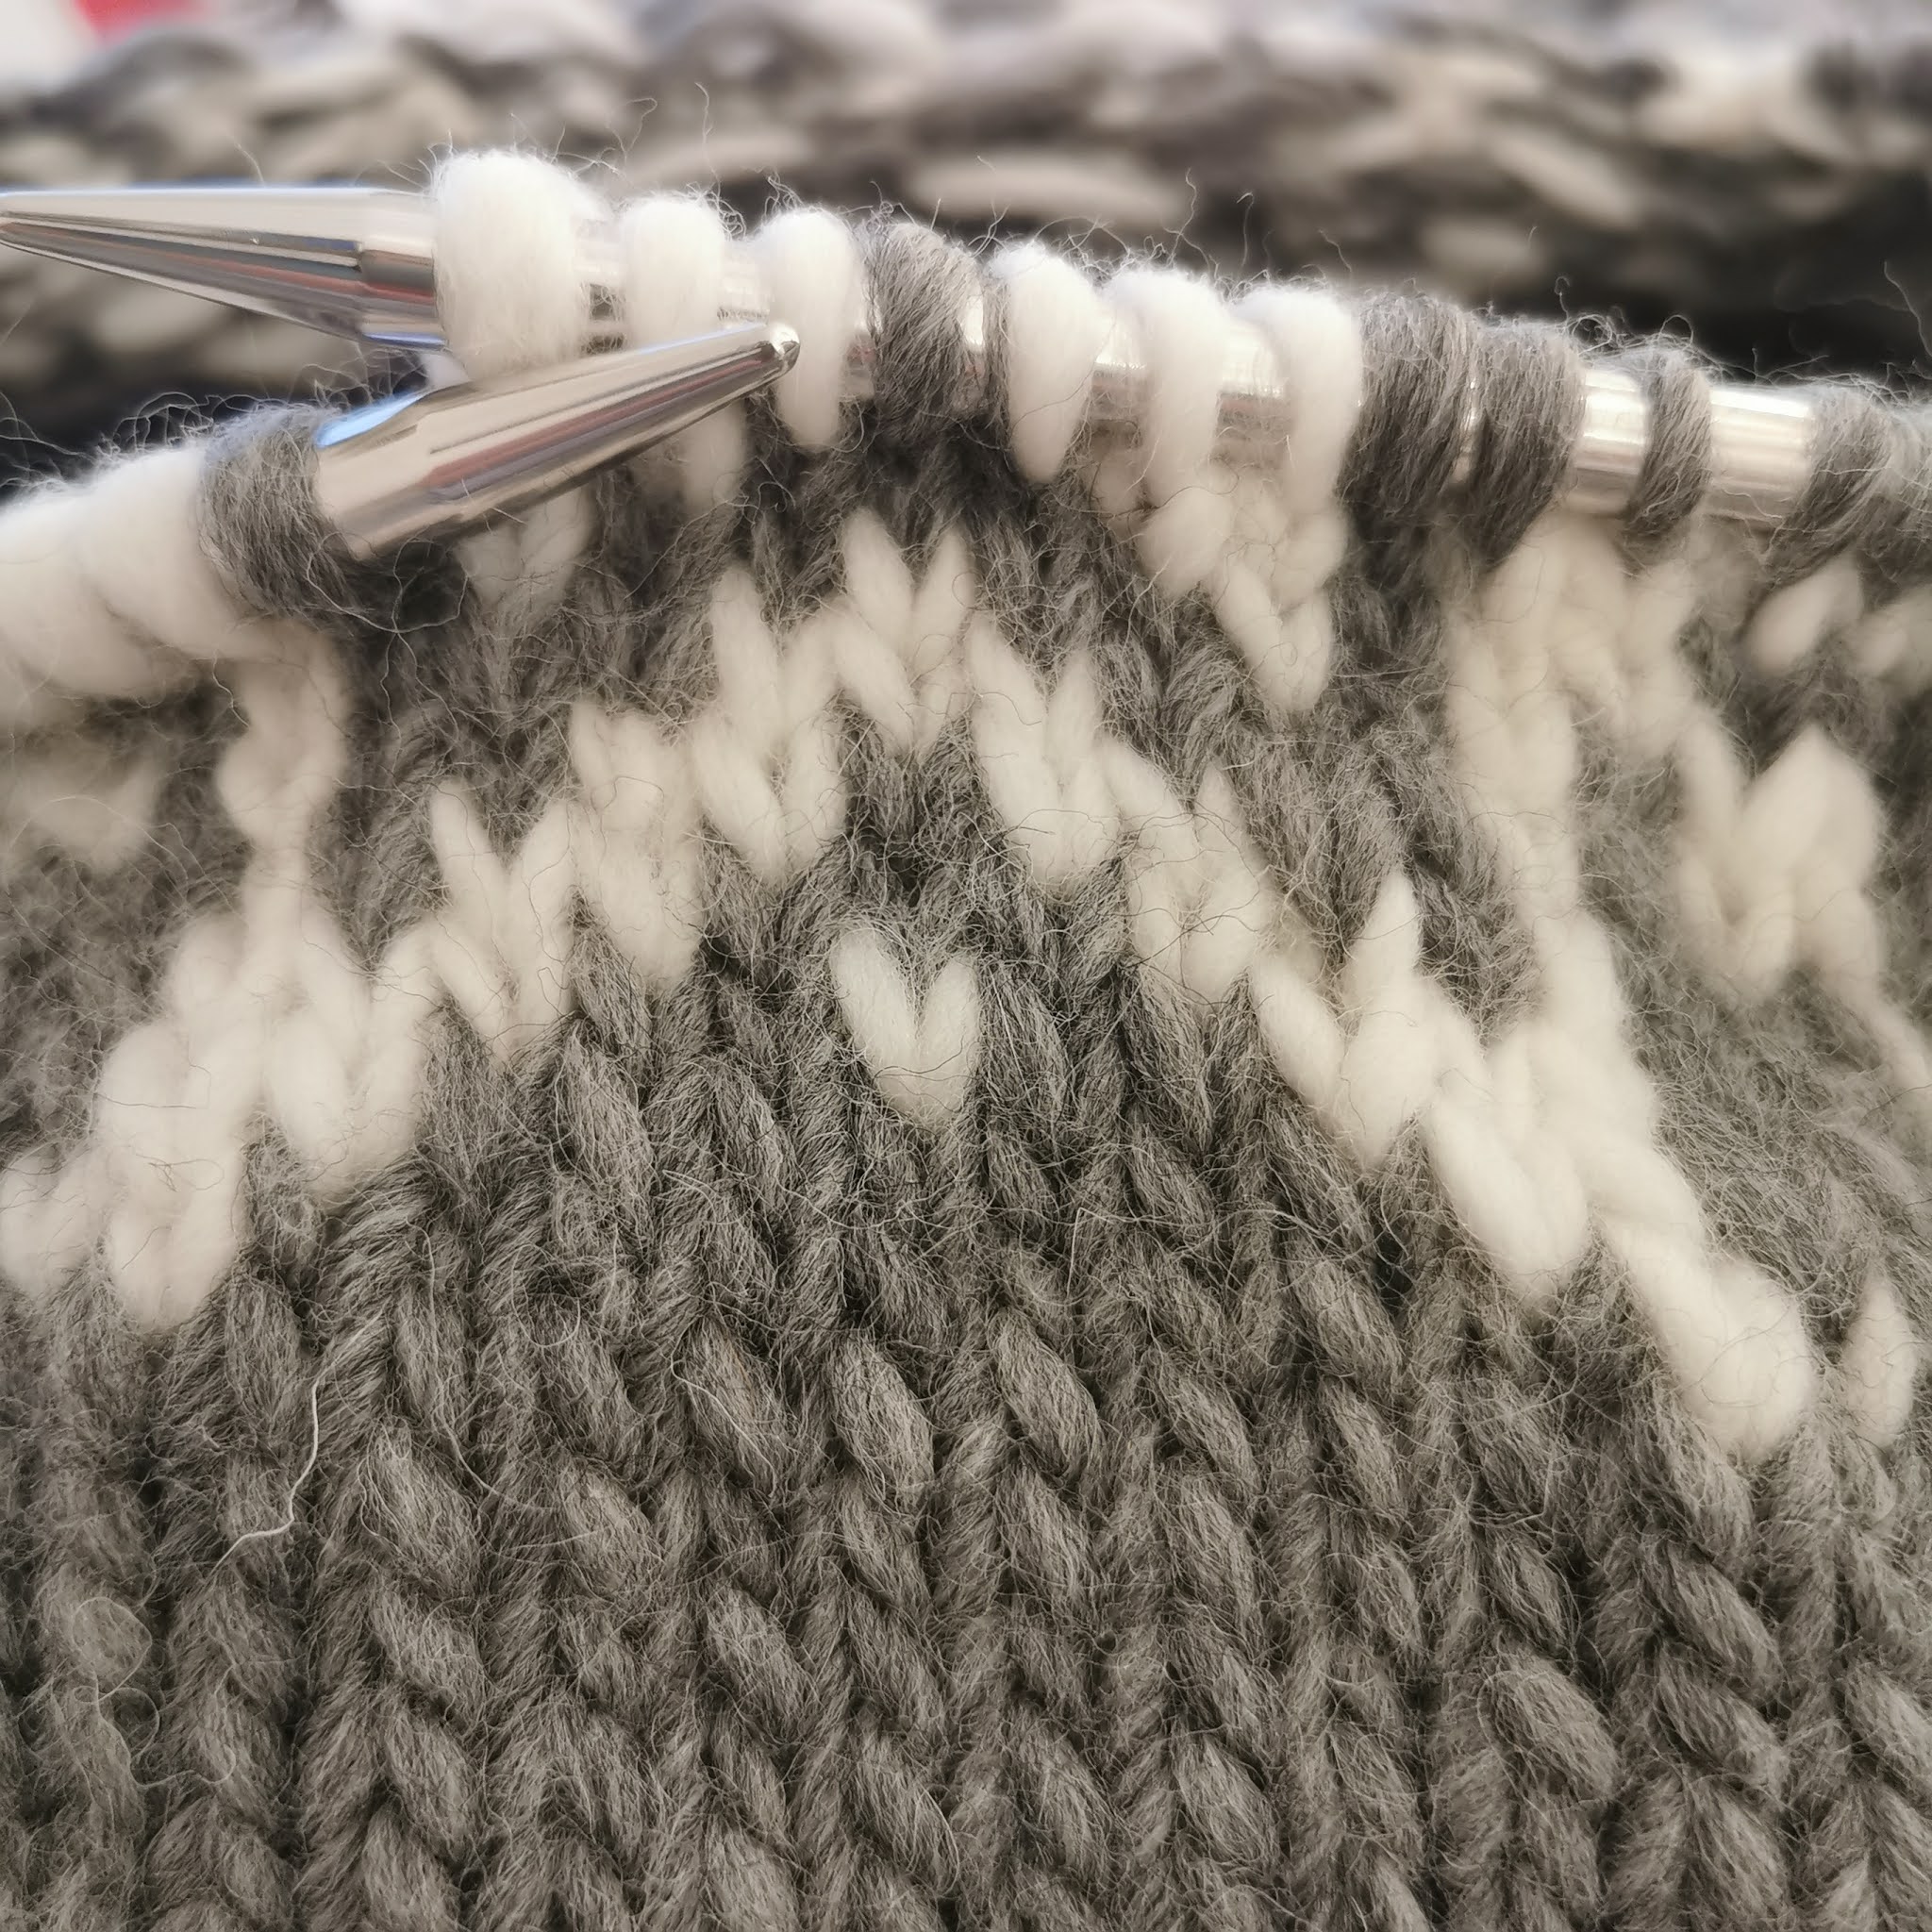
Close up of stranded knitting, note the orange
embroidery thread, marking the beginning of the
row as this is knitted in the round 


I love the name of this pattern, its called Oh Deer! To find this pattern, click on the link:  Oh Deer! pattern  The pattern called for Drops Muskat yarn but confess I did not have any, so used what I had to hand which was Drops Cotton Light, Dark red (17) and White (02) and think it worked well.  The chart to follow on this pattern is repeated twice so that each side of the potholder will have the deer pattern on.  Making the potholder on circular needles ensures that the potholder will do its job and protect your fingers as it has double the thickness. Finishing off at the end with making loop it attaches well to my oven and ready to use at every opportunity.  Just hope I don't have too many 'oh deer' moments in the kitchen this advent!


Using the backdrop of a typical Norwegian shed
 painted in the usual barn red colour


Whilst I had the potholders in Norway I also used
the backdrop of my grand father's hand-carved work

Are you a knitter or a crocheter?


Scandinavian Hanging Christmas Hearts Garland

December 18th

I am definitely a starter and not a finisher.  If left to my own devices and not spurred on by this blog it's true to say my house could have become overloaded with WIPs, (works in progress) there's enough of them now if I'm honest.

In the summer when I return home to mamma I always chill and craft more than at any other time of the year.  It's my haven and my guilty pleasure, though not so very secret.

Each summer I choose to learn a new craft, until that was this year, when I knew I had to get a move on with Christmas makes.  Knowing that the first 10 days in December I would be away from home and so I needed to be organised.

Knitting Christmas makes in the middle of a Norwegian warm summer was odd but strangely satisfying.  When visiting the local library and asking for their Christmas craft books I had to wait a while as they dug them out of storage for me!  What fool would want Christmas books in July?  Me of course...

Initially fiddly to begin, but once you are past
about row 5 it becomes quick and enjoyable to knit
But back to being a starter and not a finisher. Neither the wine box cover [Wine box cover post ] nor these hearts were completely finished in Norway and so these past few days I have been frantically 'finishing up'.  And just in time too, phew.  It's never a good idea to leave something for a few months and come back to it as the flow has gone and it takes a while to get back into the swing.  But I must say I am delighted with the makes.

I will not share the pattern here now unless someone wants me to as I suspect it is too late for this Christmas, but ping me a message in the comments if you want it and I'll post it up in all it's glory for you in the New Year.  I'm actually thinking of making more in Spring like colours to hang on the door.


The hearts knit up quickly

A Norwegian summer and crafting always takes place


They even feel Christmassy here despite it being July


Finally having stuffed them and woven in the ends, joined them together and crocheted the hanging top loop, my vertical heart garland is ready for Christmas.  
What do you think?  Full of Scandinavian feel I think.


Vertical hanging heart garland

  Are you almost ready for Christmas yet?  


Christmas wine cover

A wine box cover
December 15th


Have you ever been to Norway?  Do you know how expensive alcohol is over there?  You need to take a mortgage out to be able to even sip alcohol.  You can buy beer at the supermarket, but not on a Sunday and anything stronger regardless of the day, you need to go to the government controlled 'Vinopolis.'   The cheapest bottle of wine is about £15, last summer I ordered a glass of wine, not in the expensive capitol, it cost me £11, I nearly fell off my chair and not even from over drinking, who could on those prices!


That said the cheapest way to drink wine is to buy it by the wine-box, the most common size being a 3 liter.  Many Norwegian pattern books provide knitted wine-box covers and I thought it would be fun to design my own for Christmas, it does mean that I now need to go out and buy myself a box...

Wine box cover
Using double knit yarn
Colour A 100g ~ on the chart this is grey
Colour B    50g ~ on the chart this is white
Colour C scraps of yarn ~ on the chart this is red

Cast on 92 stitches in colour A
Knit 2 rounds, use a stitch marker to help keep track
Row 3 creates space holes for the elastic at the bottom of the wine box, to create this:

Make one, knit 2 together for the entire round. (I actually have not put elastic in my wine cover, I quite like the rolled up effect, but may add it in at a later date.)

The first row after will be difficult to knit, you will still have 92 stitches.

Place stitch markers in each corner after 17, 29, 17, 29

Knit until it measures 4 cm
Tap hole created

We now continue with the single colour yarn A but we need to make a hole for the wine tap.  This means that we are not going to knit in the round for the next 8 rows, but will be knitting backwards and forwards...

K6, cast off 5 stitches, K6 (this is the first short side and would equate to 17 stitches)  Continue the row in knit.  As we have now cast off 5 stitches we will have to purl back on the next row and the following row will be knit.  Continue to alternate rows, knit and purl back and forth for 8 rows in total.

Beginning again on the short side K6, cast on 5 stitches and continue to knit to the end of the row. Continue to knit in the round for a further 2 rows.


Then begin your pattern or follow mine!  Remember that you will need to repeat the pattern twice on each row so that you have the short side pattern (in this case the hearts) followed by the long side pattern (in this case the deer) and need to repeat each again.


Chart for the long side
29 x 42
Chart for the short side
17 x 42


Here you see one long side and the front short side
(it has a red heart, the back short side does not)

Here we see the second long side with the deer
and the back short side, no red heart


Once you have completed the chart we need to begin to knit the top of the wine box cover.

Checking for size is very important
So to begin the decrease on the top of the wine box:

*K1, K2tog, K23, K2tog through the back loop, K2, K2tog, K11, K2tog through the back loop, K1* This completes half of the round, is one long side and one short side.  you now need to repeat between ** to complete the row, (88 stitches)

We are now going to repeat the above procedure on every row BUT where we have a run of knitting ie above K23 and K11 we need to reduce each one by 2 stitches each row, so the next row will be K21 and K19.

Continue with each rowing decreasing by 2 stitches until you are left with 7 stitches on the short side.  Cast off and if desired single crochet and the edge here where the handle should be and also around the tap hole on the short side.


Stitch markers so I knew where the corners were

Having made this during the summer I am delighted to bring this out now for the first time at Christmas.  I get pleasure every time I go to fetch myself a sneaky drink or three, hic ;)


Christmas  knitted wine box cover 


  We are almost into single figure count down to Christmas, yippee!  


Christmas Five on Friday

December 9th (second post of the day)

Every December I write a post a day to share my love of the festive season.  My Scandinavian heritage is largely to blame for my enthusiasm for this time of year and those of you who read this blog may remember that I began blogging originally just at Christmas time so that there was a record of our family traditions and all the recipes for my children to follow in years to come should they so wish, helping to keep the traditions alive.

Today is day 9 so I cannot share all posts but I will pick out 5 photos from five different blog posts so far this month in case you are interested...


Festive knitted wrist warmers

A fun and easy knit, free pattern in above link


Brunne Pinner Cookies

A gentle Christmas nutty flavour cookie,
recipe in above link

Kitchen pot holder


Knitted heart, knitted double so it can be used as a pot holder,
free pattern in above link

Norway's favourite Christmas cookie: Pepperkaker


A must make cookie in our Christmas house,
free recipe in above link

Advent cake


A great cake to eat in the run up to Christmas,
full of subtle Christmas flavours without
being over powering.  Keeps for well
over a week, free recipe in above link

Joining in with Amy in December to bring some festive posts, 
do pop over and see what others are sharing today

 Wishing you all a calm and happy 
run up towards the end of December  

December wristwarmers

December  6th

A hint of red under the coat

I love mittens and gloves but confess to not being able to keep them on for too long.  My hands just become too hot. My solution after several years has been to wear wrist warmers if the weather is not too cold as that seems to be enough for me. Warmth around the wrist where the cold air can seep in between the coat cuff and my skin.

So a perfect excuse to grab those knitting needles and make yourself a pair or maybe even gift them away.  I am actually thinking of making a navy blue pair next for my husband.

They are incredibly quick to knit up one or two evenings maximum I would guess and are perfect for intermediate knitters as you do have a few rows of using three colours at once.
Beginner knitters, this is such a small project that you really could give this a try! If three colours is too much for you, omit the Christmas tree and go with the white snow flecks instead.


Knitted wrist warmer number two in the making

Close up of the knitted pattern


Full effect of the wrist warmer 


WRIST WARMER PATTERN:

Using dk wool of your choice and appropriate needles, I tend to prefer dpn, but you could very easily use circular needles instead.
The wrist warmers can be made in either the standard long length or can be adapted to be made into shorter wrist warmers.

Cast on 32 (8 on each of the four dpn)
Rows 1 - 10
knit in rib ~  knit 2 pearl 2

Rows 11 - 31
Begin the pattern at bottom left hand corner.  Start each row from the left side of the chart.  The pattern follows a repeat after 8 stitches, so if you are knitting on dpn each needle will follow exactly the same pattern.

SHORT VERSION:  If you wish to have short wrist warmers that literally just cover the wrists then follow the pattern with ribbing on either side only and no plain red after the pattern.
Short version only:
After the pattern
Rows 32 - 42 
knit in rib ~  knit 2 pearl 2
Cast off

Make second wrist warmer.

STANDARD VERSION:

Rows 32 - 62
Knit 30 rows
NOTE: If your lower arms are larger than average, as are mine, then you will need to increase stitches to accommodate for the widening of the arm.  I added 8 stitches making one at the beginning of each of the following rows: 32, 36, 41, 45, 49, 53, 56, 60 = total of now 40 stitches in each row


After the pattern
Rows 63 - 73 
knit in rib ~  knit 2 pearl 2
Cast off

Make second wrist warmer.

Please note the numbers at the side do not correspond to the written pattern


Please note the numbers at the side do not correspond to the written pattern


♥   Keep warm out there   ♥

Just for Fun

October 14th

Thought I would mix it up a bit today and have put in my 5 latest makes, dare I mention the
C word?

As we are still only in October, I will not share with you what I have been making fully but instead give you a glimpse of some of my makes for December blog posts.  Can you guess what any of them are, some easier than others.  I would love to know what you come up with.  Have you any suggestions about good Christmas makes?  I am a girl who prefers quick makes but not adverse to something more substantial either... so without further ado, join in on  Guess the Make Quiz: 

This one has prompted a few ideas on IG, what do you think it is?

Photographed whilst incomplete, but can you hazard
a guess as to what it ended up as?

A close up of a knitted make

This one is too easy surely, but what is the design?

Mostly in shadow here, what is it?

Joining in with Amy
Sharing my Quiz of Five
Pop over & see what others are sharing

♥  Have you begun with any Christmas preparations yet?   ♥