Well it is June already, phew the year is flowing along so fast and I think I am loosing my marbles... left my crocheted and well loved glasses case in Norway, see post here , so I decided before work this morning to hook up another one quickly. There is a moral here, do not rush and measure accurately! What did I make this morning...
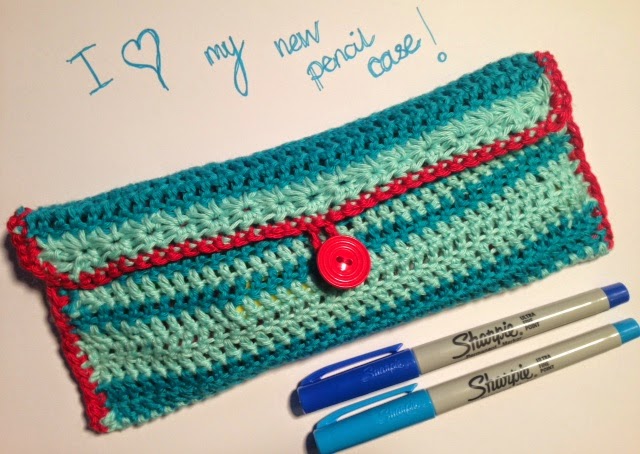
... a pencil case!
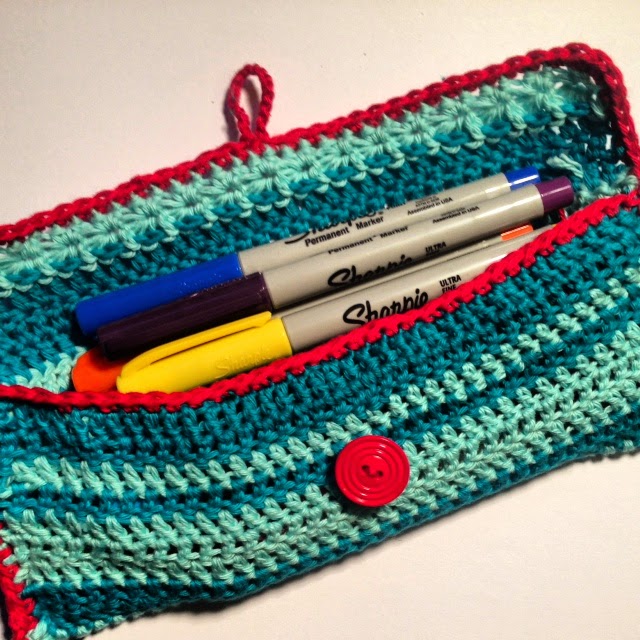
As it happens, I love it and have been wondering where to hide my lovely new Sharpie pens away from the children, once in their grubby mitts, the tips would be ruined and I would never see them again, so for now at least, they are safe in my new pencil case and I need to crack on with making a crocheted glasses case.
It was quick and simple to hook up, see what you think...
Crocheted glasses case/pencil case
You will need colours of choice. As I wanted the glasses case for today at work, I opted for a quick two colour stripey effect, unlike the more colourful case made previously, see above link.
 |
| Look my new double ended crochet hook! |
Chain required width for pencils or glasses, underestimate the width, unlike here in the below example, where it should have been obvious, that the case would be too long! Here I chained 45, in reality I think it should have been 30.

Again, for speed, I chose to hook stitches in double crochet. Chaining two at the end of the row and crocheting the first dc into the second stitch.

Within minutes the case grew rapidly.

I continued to check for the correct length required, for the crochet to cover the front and back of the glasses and to have a flap to overlap for fastening.

Once I was happy I was almost at the required length, I decided to add some crochet detail by using star stitch for the last row. I thought this would look good on the flap.
To make the star stitch, it is VERY IMPORTANT to begin this stitch on the right side of your crochet as the back will look very different. Chain three.

Into the middle chain, insert hook, yarn over and pull through.

Into the first chain (bottom chain), again insert hook, yarn over and pull through.
You should now have three loops on the hook.

Into the first stitch of this row (last stitch of the previous row) insert hook, yarn over and pull trough. Do this for the next two stitches. You should now have six loops on the hook. It is important to keep the tension loose and not pull tight, otherwise the rows will creep inwards. Don't do it, I've been there with my mood blanket and it is painful. See post here.


With all six loops on hook, chain one.

This closes the star stitch.

Insert hook into the 'eye' of the star stitch, yarn over and pull through.

Look carefully and insert hook into the last 'spoke' of the star stitch, yarn over, pull through.

Into the next stitch, insert hook, yarn over and pull through, do this to the next two stitches. Again you should have six loops on the hook, yarn over and pull through all six loops, this will have created the second star. Continue like this until the end of the row, finishing with a hdc in the last stitch.

Front view of the star stitch so far.

Back view of the star stitch so far.

To complete the star stitch you need to crochet another row, chain two and turn. Make a hdc in the 'eye' of the star stitch. Then in all remaining 'eyes' make 2hdc.

Once you create the row of hdc into the eyes, the star stitch really
comes into it's own and looks lovely.


Now it was time to fold over the case. At this point, I realised three things.
1) If I didn't hurry up, I was going to be late for work and that was not an option
2) I felt the the colours did not give the 'zing' I desired
3) The glasses case was looking suspiciously too wide and not fit for purpose

So, in haste I decided to add a sc row around in red,
this would serve to join the sides and to add the 'zing'.


Once the red had been crocheted all round, I folded the case width ways in half and chained a single row of 8 chains, enough to fit around a small button.

Finally I located a matching red button sewed it on and confirmed my fears, that indeed the case was too large for my glasses and I would have to now dash out of the house with my glasses on the top of my head as I did not want to risk scratching them in my bag!
But instead, on arriving home this evening, I came upon a brain wave so as not to waste the mornings effort and used the case, which I rather like with the red edging to house my newly acquired set of fine nibbed Sharpie pens.
...and guess what I started hooking up tonight

... a smaller version, hopefully for my glasses this time!
Have a great first week of June everyone ♥
That's beautiful. I'm going to use your pattern for my sunglasses. Thank you for such a clear and inspiring tutorial.
ReplyDeleteYou are very kind, would love to see what you make, sure you will add your great 'twist' to it x
DeleteOh Selma! Well, you have a great if unexpected pencil case so that is good, and I am sure that glasses case mark 2 will be great for your glasses, shame that you lost your old one though, I look back and it was so lovely! perhaps when you have more time you will make another one that looks like your old one. I hope that Mark 2 goes well and takes care of your glasses! xx
ReplyDeleteThanks Amy, I did love my old one and secretly hope it will turn up in Norway, think I know where it is, but will not be back there for a while, hence the need to make another one. Became too blerry eyed last night to finish mark 2 and hope to do that tonight after work. Am also hoping time permitting to put up some pictures from norway in the next day or two, watch this space...
Delete